Custom field type in the SharePoint Add-in model
Summary
The approach you take to provide customized end user experiences is different in the new SharePoint Add-in model than it was with Full Trust Code. In a typical Full Trust Code (FTC) / Farm Solution scenario, custom field types were created with the SharePoint server-side object model code by inheriting from one of the built-in field type classes and creating a field type deployment file (XML). These components were deployed via SharePoint solutions.
In a SharePoint Add-ins model scenario, customized end user experiences are implemented via client-side rendering. In this approach, JavaScript files are used to implement customized end user experiences. The remote provisioning pattern deploys the JavaScript files and registers them with SharePoint fields via the JSLink property.
From an end user's perspective the capability/result looks the same.
Important
JSLink based customizations (client-side rendering) are not supported in modern experiences. This includes modern lists and libraries, including JSLink support in the list view web parts of the modern pages. Client-side rendering is supported in the classic experiences in SharePoint Online or in on-premises.
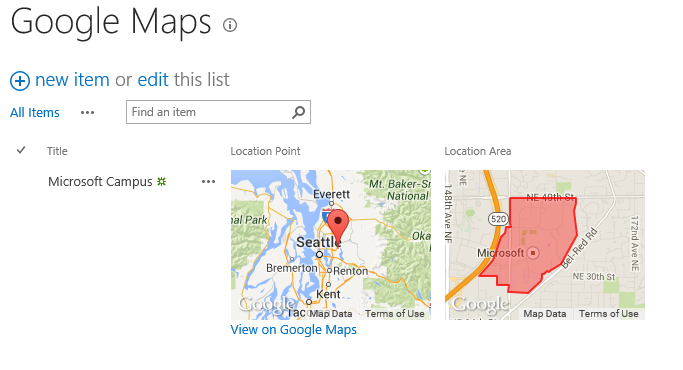
Here are some examples of custom field type that implements a Google map. These come from the Branding.JSLink Office 365 PnP Sample.
Thumbnail Google map images displayed in a list view:
Inline editing showing a larger Google map thumbnail:
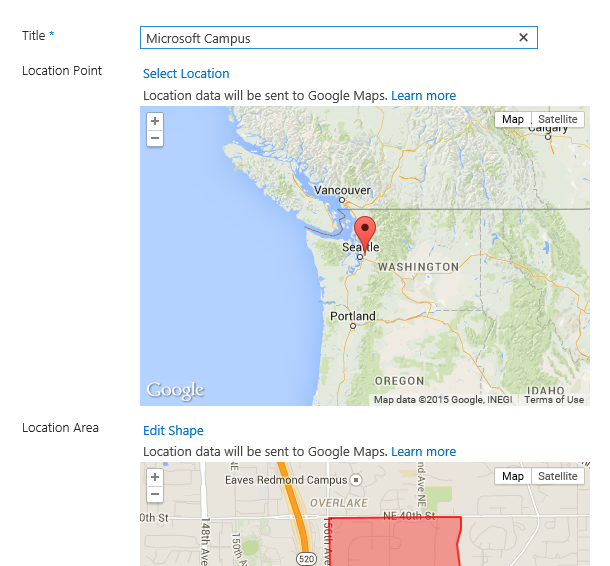
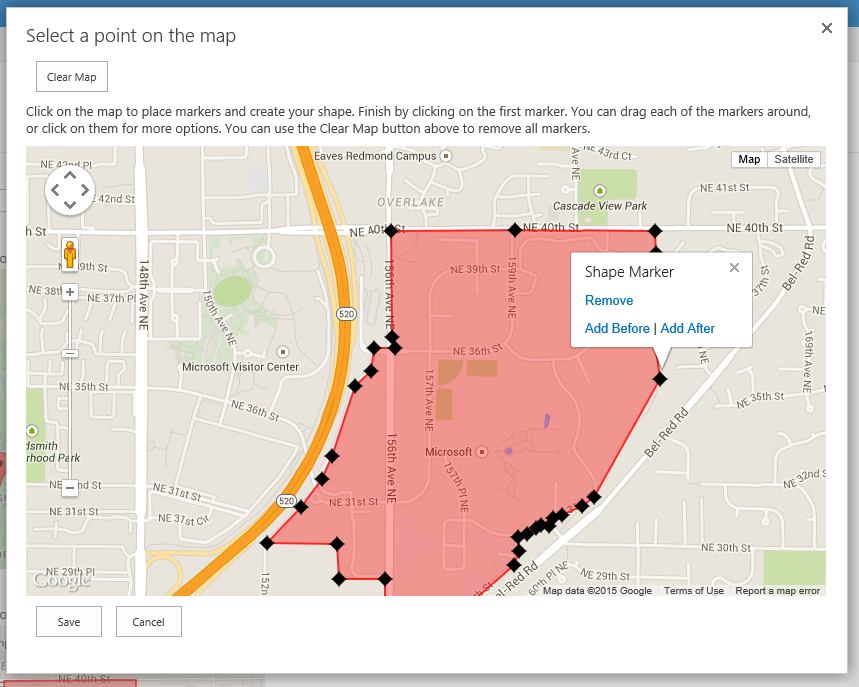
A dialog enabling inline editing:
High-level guidelines
As a rule of a thumb, we would like to provide the following high-level guidelines for implementing client-side rendering.
- Use JavaScript files and client-side rendering to implement custom field types.
- Use the remote provisioning pattern to deploy JavaScript files and register them with SharePoint fields or List View web parts.
- Register the JavaScript files with the Minimal Download Strategy (MDS) engine to ensure the MDS engine is aware of the custom rendering JavaScript files.
- Setting JSLink property to host web requires at least full permission at web level, so this approach is not suitable for add-ins at the SharePoint store
Options to implement client-side rendering with JavaScript files via the JSLink property
You have a couple of options to implement client-side rendering with JavaScript files via the JSLink property.
- Set the JSLink property on a List View web part that renders a view of a SharePoint list.
- Set the JSLink property for a SharePoint field.
- Set the JSLink property for a SharePoint content type.
Set the JSLink property on a List View web part that renders a view of a SharePoint list
In this option you set the JSLink property on a WebPartDefinition.
- This approach does not specifically create a custom field type at the SPField level.
- Therefore, the custom rendering only applies in the List View web part where you set the JSLink property.
- This approach allows you to change the rendering for one or more SharePoint fields at once.
- This approach may be done with declarative code, with the SharePoint server-side object model, with the SharePoint client-side object model (CSOM), or via PowerShell.
- We recommend you use the SharePoint server-side object model, the SharePoint client-side object model, or PowerShell to set the JSLink property via the remote provisioning pattern.
When is it a good fit?
When you need to define specific views for SharePoint list data and modify the rendering for more than one SharePoint field, this is a good option.
Getting started
The following sample sets the JSLink property on a SharePoint List View web part.
- Branding.ClientSideRendering (O365 PnP Sample)
- Includes 9 samples that set the JSLink property on a SharePoint List View web part and an explanation of how each sample was implemented.
- The RegisterJStoWebPart method sets the List View web part's JSLink property.
Set the JSLink property for a SharePoint field
In this option you set the JSLink property on an SPField.
- This approach specifically registers the JSLink property at the SPField level.
- Therefore, the custom rendering will apply everywhere the SPField is rendered.
- This approach allows you to change the rendering for one SharePoint field.
- This approach may be done with declarative code, with the SharePoint server-side object model, with the SharePoint client-side object model, or via PowerShell.
- We recommend you use the SharePoint server-side object model, the SharePoint client-side object model, or PowerShell to set the JSLink property via the remote provisioning pattern.
When is it a good fit?
When you need to define a specific view for a given SharePoint field and ensure the view is always used when the field is rendered, this is a good option.
Getting started
The following articles demonstrate how to set the JSLink property on a SPField.
- Using the JSLink property to change the way your field or views are rendered in SharePoint 2013 (Tobias Zimmergren)
- Using JSLink with SharePoint 2013 (MSDN Magazine)
Challenges with implementing client-side rendering with JavaScript files via the JSLink property
As you develop custom client-side rendering components, keep in mind the following things.
Not all SharePoint fields may be overridden with the JSLink property.
- The TaxonomyField is a good example.
JSLink supports several tokens.
- _layouts
- _site
- _siteCollection
- _siteCollectionLayouts
- _siteLayouts
You can register the JSLink JavaScript files with the SharePoint Script On Demand (SOD) framework to lazy load the file.
Use the (d) tag at the end of the JSLink URL to register the file with the SOD.
~sitecollection/Style Library/JSLink-Samples/DependentFields.js(d)
You can load multiple JavaScript files via the JSLink property.
This is especially helpful if you have a library of JavaScript files that implement your client-side rendering.
Consider using this approach when targeting mobile devices because it allows you to deliver just the JavaScript you need to implement a given SharePoint field's client-side rendering.
Use the | character to separate the JavaScript files you wish to load.
~sitecollection/Style Library/JSLink-Samples/MainLibrary.js|~sitecollection/Style Library/JSLink-Samples/SpecificField.js**(d)**
Related links
- SPField.JSLink property (MSDN API Docs)
- Using the JSLink property to change the way your field or views are rendered in SharePoint 2013 (Tobias Zimmergren)
- Using JSLink with SharePoint 2013 (MSDN Magazine)
- Guidance articles at https://aka.ms/OfficeDevPnPGuidance
- References in MSDN at https://aka.ms/OfficeDevPnPMSDN
- Videos at https://aka.ms/OfficeDevPnPVideos
PnP samples
- Branding.ClientSideRendering (O365 PnP Sample)
- Branding.JSLink (O365 PnP Sample)
- Samples and content at https://github.com/SharePoint/PnP
Applies to
- Office 365 Multi Tenant (MT)
- Office 365 Dedicated (D) partly
- SharePoint 2013 on-premises – partly
Patterns for dedicated and on-premises are identical with SharePoint Add-in model techniques, but there are differences on the possible technologies that can be used.
Feedback
Coming soon: Throughout 2024 we will be phasing out GitHub Issues as the feedback mechanism for content and replacing it with a new feedback system. For more information see: https://aka.ms/ContentUserFeedback.
Submit and view feedback for